There are a lot of handle types and designs out there. This won’t be a complete build along and I do not have templates for you to print and trace or glue on. There are several available out there for you to choose from and you can also trace one from an existing handle.
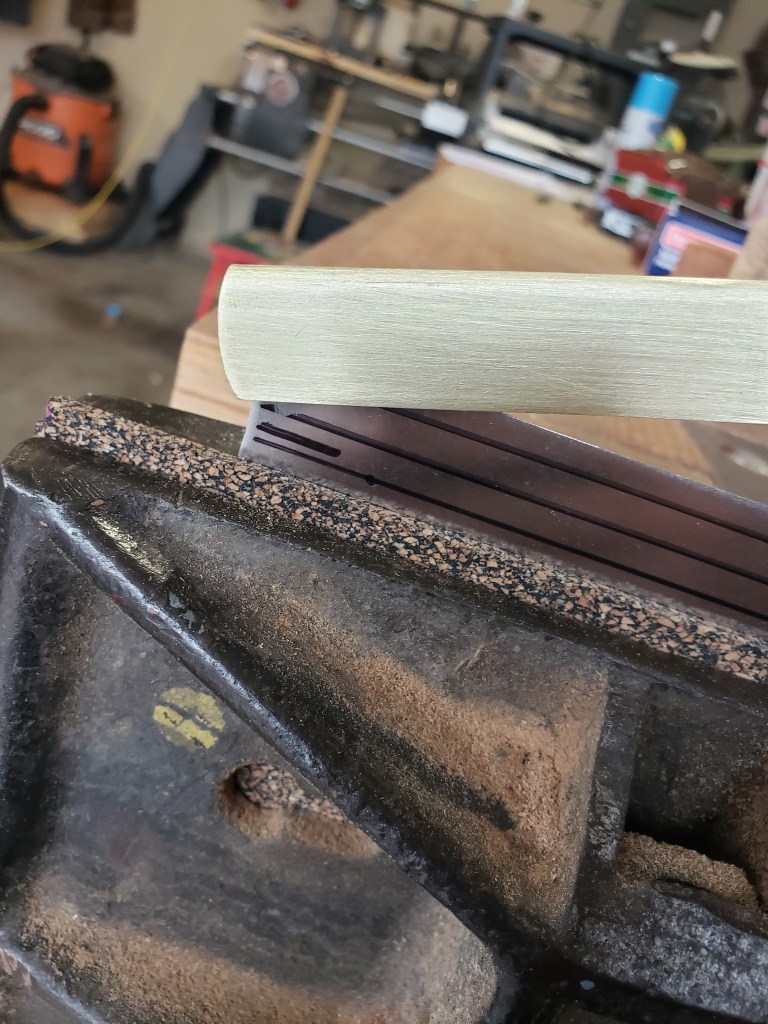
I like to start with 15/16 thick material with grain as straight as I can find. Between shaping and sanding this will get a little thinner as you go.
Trace out your handle, mark the mortise and slot angle for the plate. Do not bother to fully cut it out yet, get the nose of handle cut and mark the angle of the plate slot.

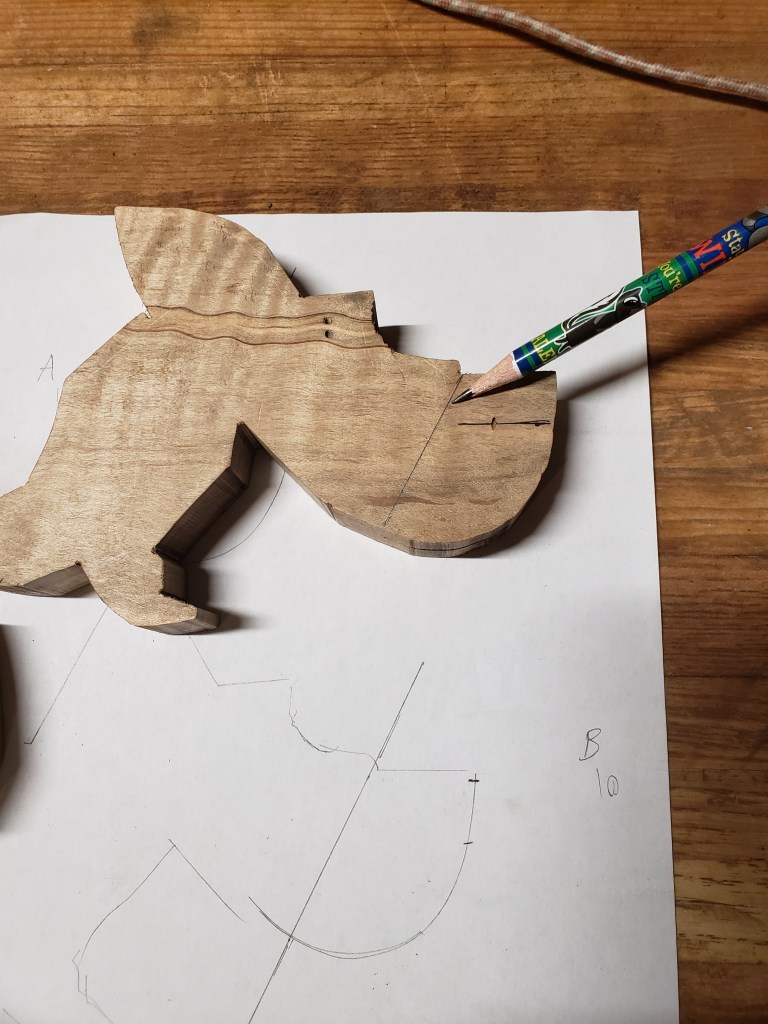

You are leaving the handle real blocky at this time because if you mess up the slot or mortise, at least you didn’t waste time on all that shaping. I use a center finding marking tool on the handle to mark my slot line.
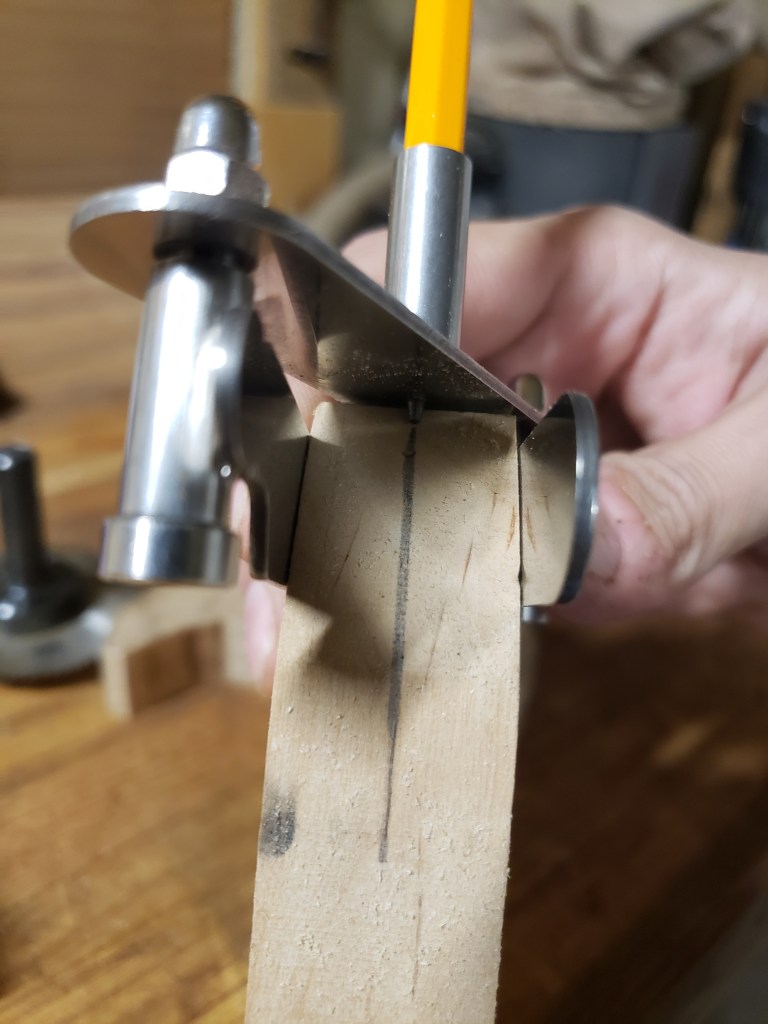
There are different ways to cut this, my first few saws I cut it carefully using another saw. Japanese pull saws are pretty thin and work great. I’ve also used a slitter blade on a drill press and on a router to start the cut and finished by hand. Key word is “start”, those little blades cannot cut the full depth and heat up and warp quickly. You must be very careful, take shallow cuts and use router safety so it doesn’t grab and throw your handle.
I recommend this,
Find a flat surface, and lay your handle blank down on one side. Use a saw with a kerf of the same thickness as your new plate, or go ahead and set and sharpen your new plate, and lay it down next to your handle. Using blocks of wood and sheets or paper, raise the blade off the table until it is raised up off the table and lined up with your slot line. Leave a 1/4 – 1/2 and inch of overhang off the blocks. Clamp this raised plate down to the table. Slide the handle blank along the teeth while still flat on the table. Adjust the plate farther out from the blocks as you need to.

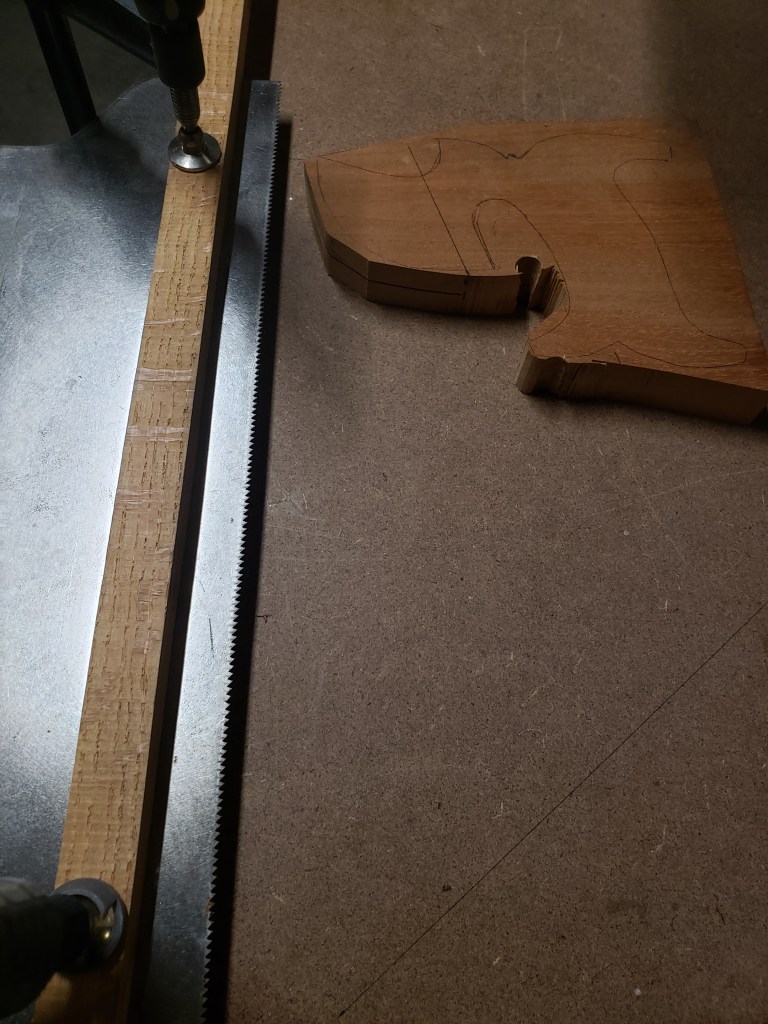
I now use a dedicated bandsaw with a modified blade to get this cut. Even with the bandsaw I occasionally mess up a handle because I get it a little off. This is why you do not cut if completely out yet.
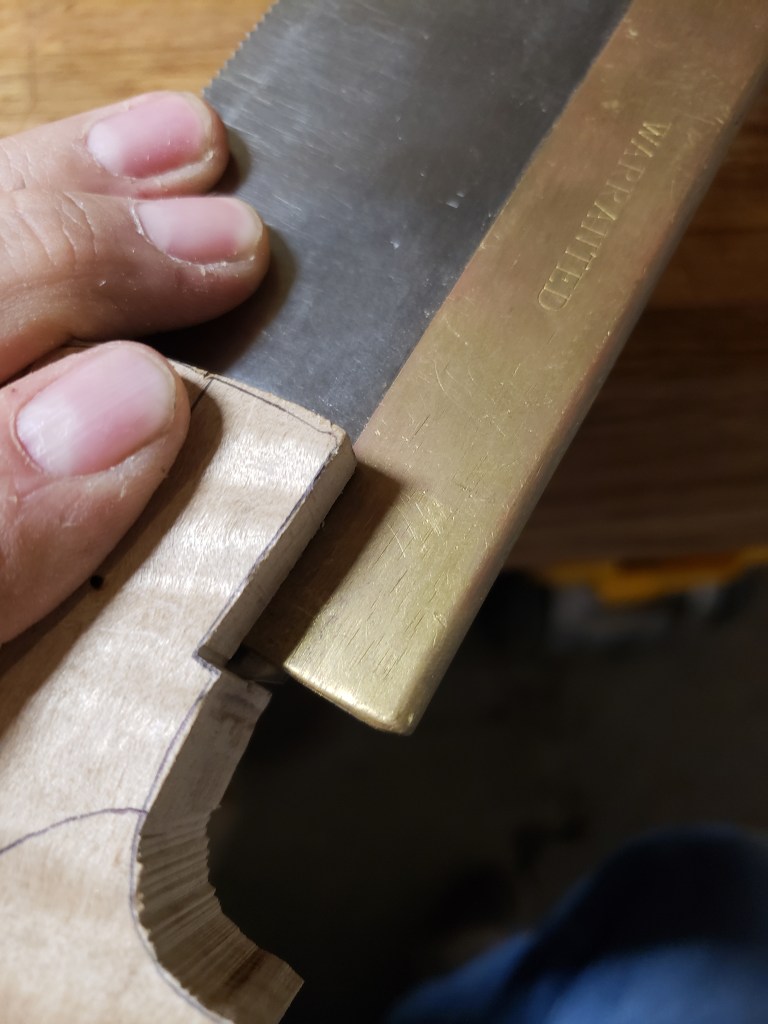
If the slot is nice and straight, let’s double check the angle of the cut and remark on the outside of handle if needed and/or mark it out on a piece of paper. Line up the end of the plate with your line and trim off the excess, have the plate up about where it will be with the back on. (I know these pictures show mortises cut already, ignore that, I will revisit the mortise)


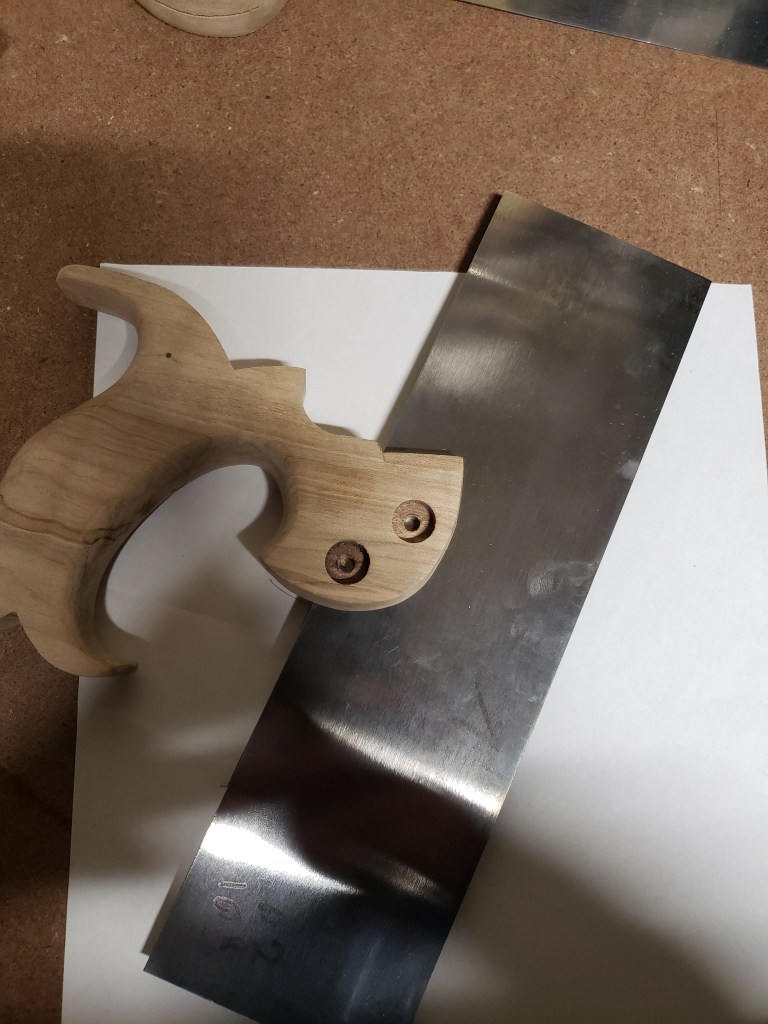

If I have sent you a kit I’ve already trimmed it down to the rough length and width you asked for but the above cut and any further trimming is up to you. Different designs will have a different angle cut on the end, some are simply a 90 degree cut and the plate won’t require extra trimming.
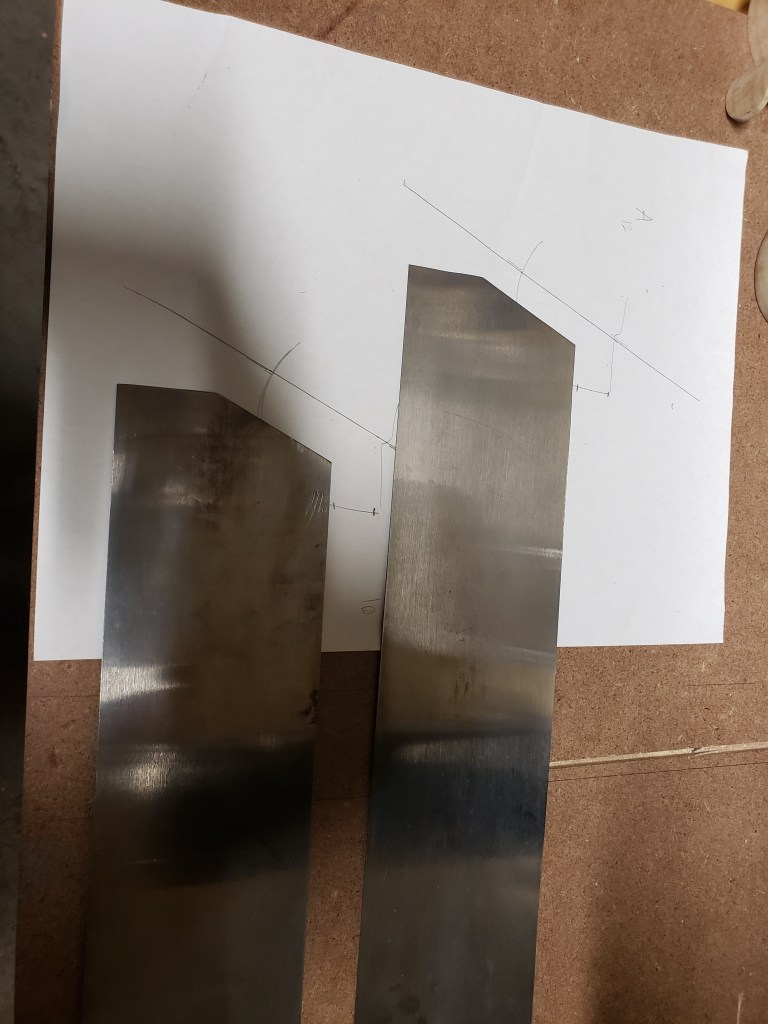
For the following pictures I decided to use a piece of angle iron, some clamps, and a grinder with a cut off wheel. (I have a large shear now, but I started out cutting my plates like this.)

Keep the cutting wheel on the waste side, just in case you don’t keep steady against the angle iron. The plate is thin and the wheel is thin, you will not hurt the metal or make it soft. Cut along your line and clean up with a file.
I sometimes send my plates with the bluing still on but lately I’ve been removing it for you. If I don’t, it requires more sanding on your part, if I do, you will need to remove the oil/wax I put on and sand and shine to your liking. Be sure to apply a new oil or wax to keep your plate from rusting.
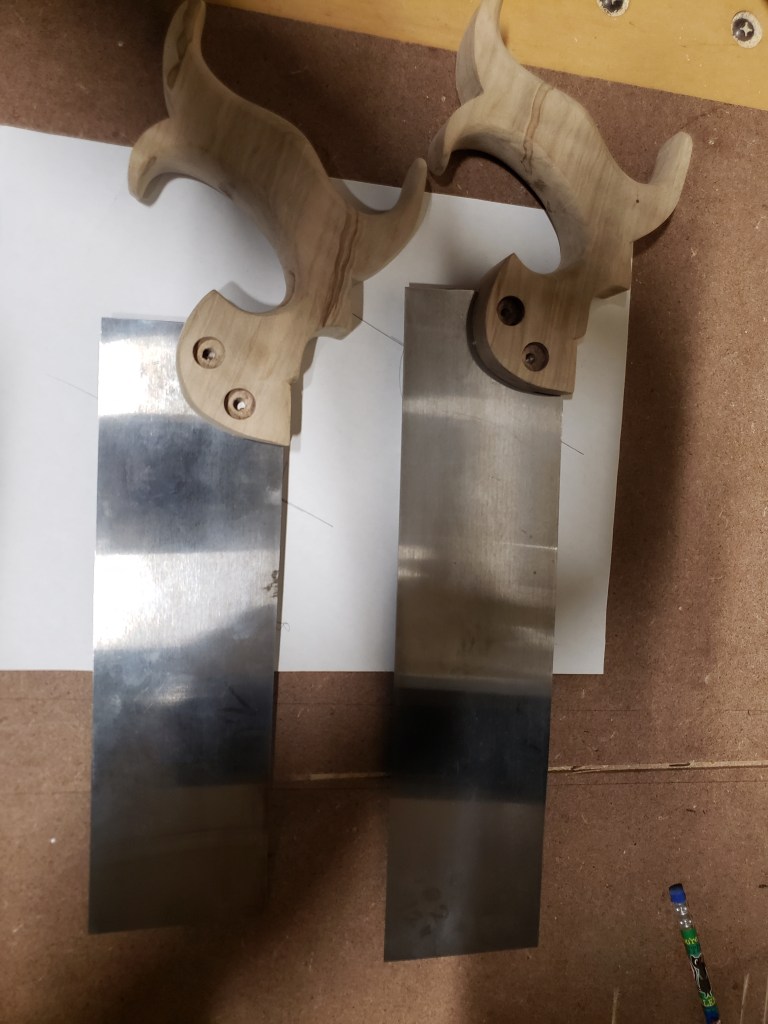
One thing to check after you have trimmed the end for the handle, is that with the plate firmly seated inside the handle, the plate runs nice and straight. If it dips down or or points up, recheck the angle and file it until it sticks straight out nice and parallel to the top of the nose of the handle.
Look at this picture again. Plate is up roughly where it’ll be in the back and it is straight.

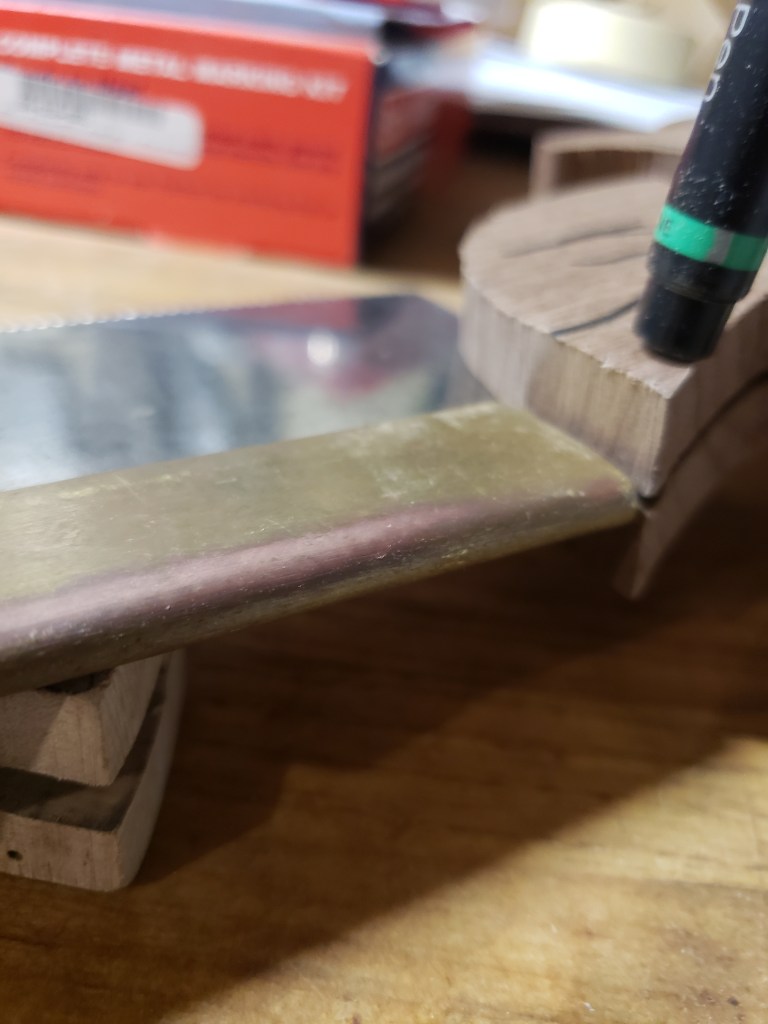
Once it seats firmly and it doesn’t rock and it is nice and level, its time to mark and trim the brass back.


The brass can easily be cut using the cutoff wheel or a hacksaw. Leave it a tad long and shape to your liking. At this time sand and shine the brass to your liking.
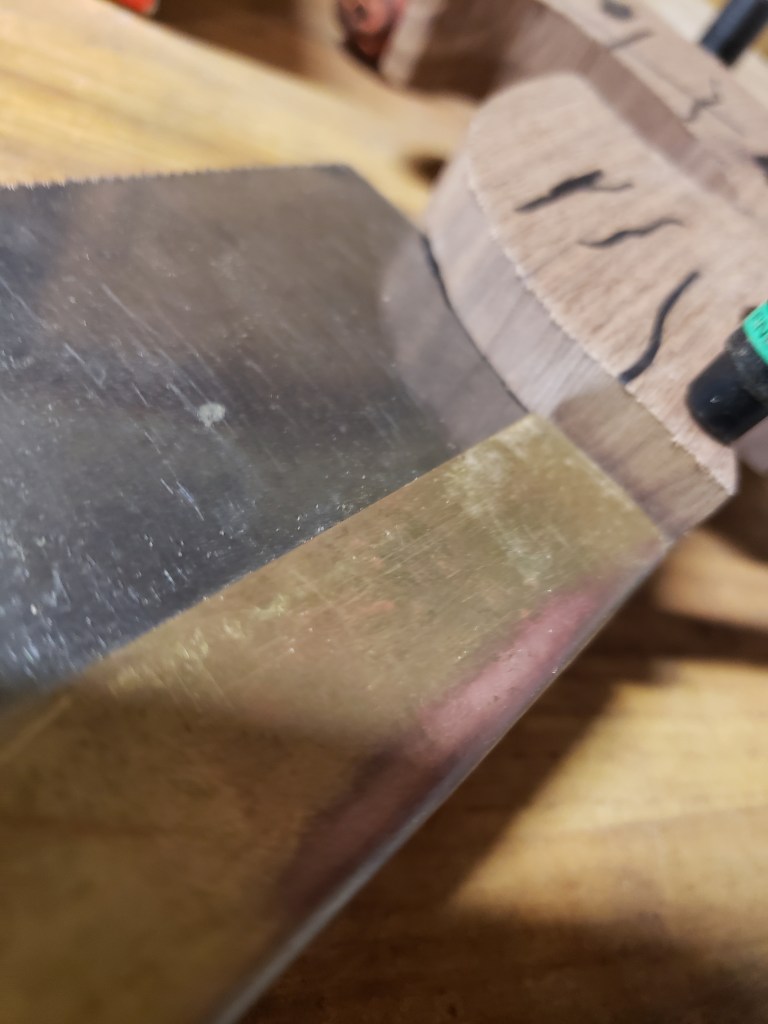
With both the plate and brass back now sanded and shined up, let’s install the back onto the plate. I like to mark lines so I know the back is going on evenly, your back doesn’t need to go down completely. A 1/4 inch on will work, as will 1/2 inch or more. I measure and seat mine at about 5/8ths of an inch down. I mark my bottom line on the plate at about 5/8ths of an inch down. But like I said it doesn’t have to be exact. I personally give myself wiggle room when cutting and then toothing to make sure I get the right DOC I’m looking for. As long as everything has gone well, 5/8ths is what need. If I accidentally trim a little too much or need to redo the teeth, I then have a little room. I can install the back a little less and still get my desired DOC.
Going off your template or handle your copying, you will have your mortise marked. With the plate seated in the slot you can use that reference mark to adjust your DOC. Once you have found it, mark your plate where the bottom of the back will be.

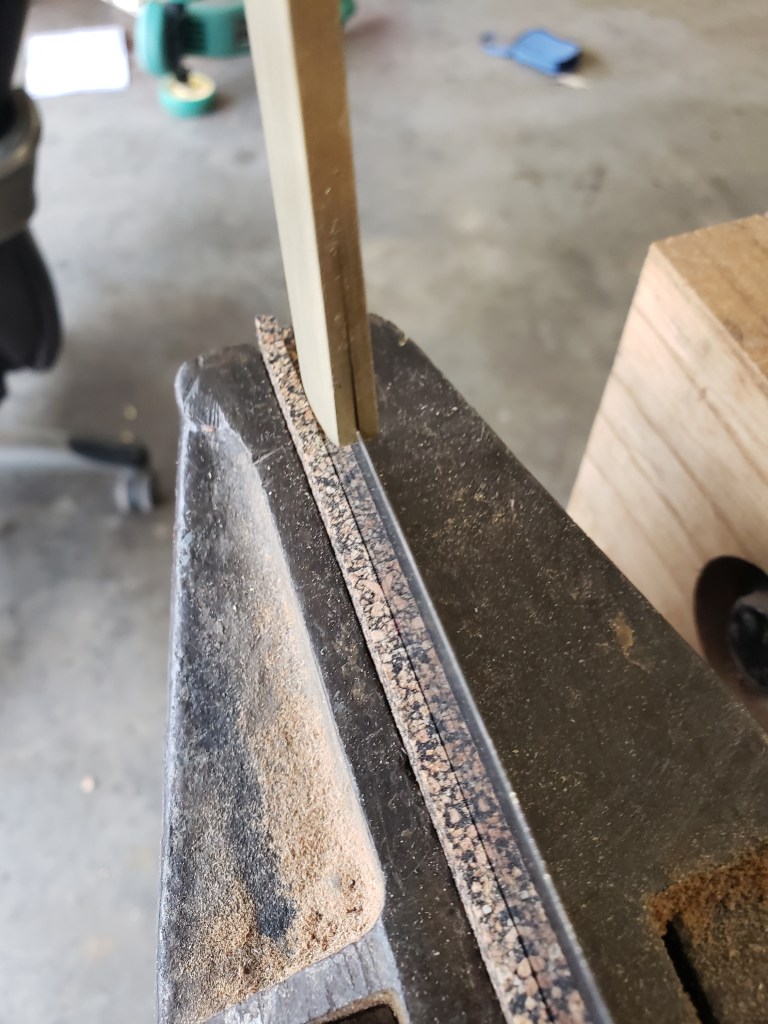
My preferred method of installing the back is using my vise. Its large enough to hold an 18 inch plate. If you do not have a large vise I will add an alternative way to install one soon.
My vise is lined with cork and I clamp the plate at shown.

The plate should be secure and the vise tight. It cannot move. Take your back start with the end that will be towards the toe of the saw. The teardrop shape has a small opening you will put on the corner of the plate. Hold it in place with one hand and using your other hand, grab your mallet and hit the other end of the back.


You will see that the plate wedges the folded back open as it goes on. The back is pinching the plate. Rotate as you tap on the other end and get the toe end of the back where you want it.
Hit the top of the back right at where the brass meets the plate to continue forcing it on. Hammer down the full length. Do not try to skip ahead to the other end.


This is important. Once it is evenly installed, tap both ends of the back but not the middle. It may not be noticeable to the eye but you’ve created an arc. The ends want to straighten out and in trying to do so is pulling the toothline tight. Remove the plate from the vise and check your toothline, it should be nice and straight. If it is not try pitting it back in the vise and tapping the top of both ends again. If this doesn’t work it may need a good full back hit. This is done by laying the brass edge on a flat tabletop, pinch the end of the plates in your fingers and flick your hand from up to down letting the back fully hit all at once. This should get out uneven tension.

At this point your plate and back are together and you are ready to mark your mortise on your handle. Slide the plate in as far as it’ll go and mark the mortise. (I use a router jig I made up to get this part mostly done, but the way I’m describing is how I did my first several saws)

Mark and carefully cut out your mortise. The slot and mortise must be parallel and the mortise needs to be a little snug. Once your done, install the plate, check that it seats and the plate is straight. Use a clamp or vise to simulate bolts being tightened. Check your toothline at this point to make sure it is straight. If it is not, either your slot, mortise, or both are not straight.
If the toothline is straight, then the mortise and slot are good!
Next we will drill holes and shape the handle.
I use a couple different kinds of bolts but the procedure is basically the same for both. Different sized heads or an added step for a shank, but the same idea. Keeping centered is important, to achieve this i use pilots. The tools I use are,
3/16 brad point bit, 3/16 carbide spade drill bit, high speed steel changeable pilot counterbores with 3/16 pilots, and a split nut driver.

First, 3/16 brad point bit to drill the initial hole.
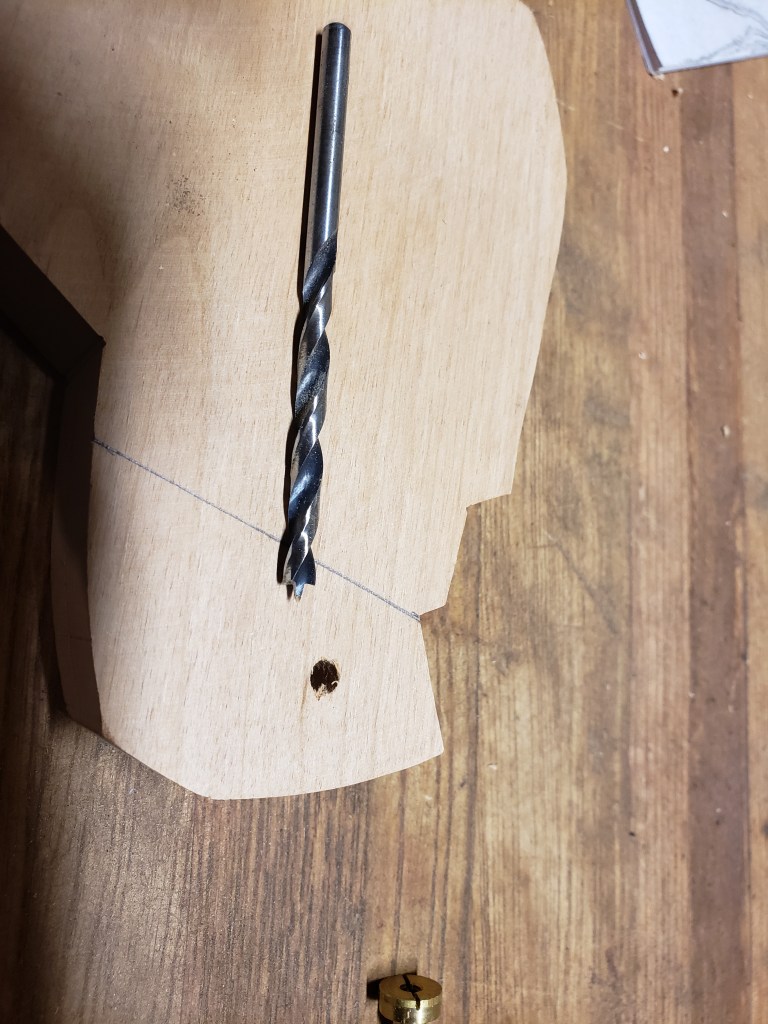
Next, take a look at what bolts you have. What size is the head? Does it have a straight shank or a 1/4 step, or does the nut have a 1/4 step? For this example, I’m using a straight shank 1/2 inch head and nut bolt set in this picture.
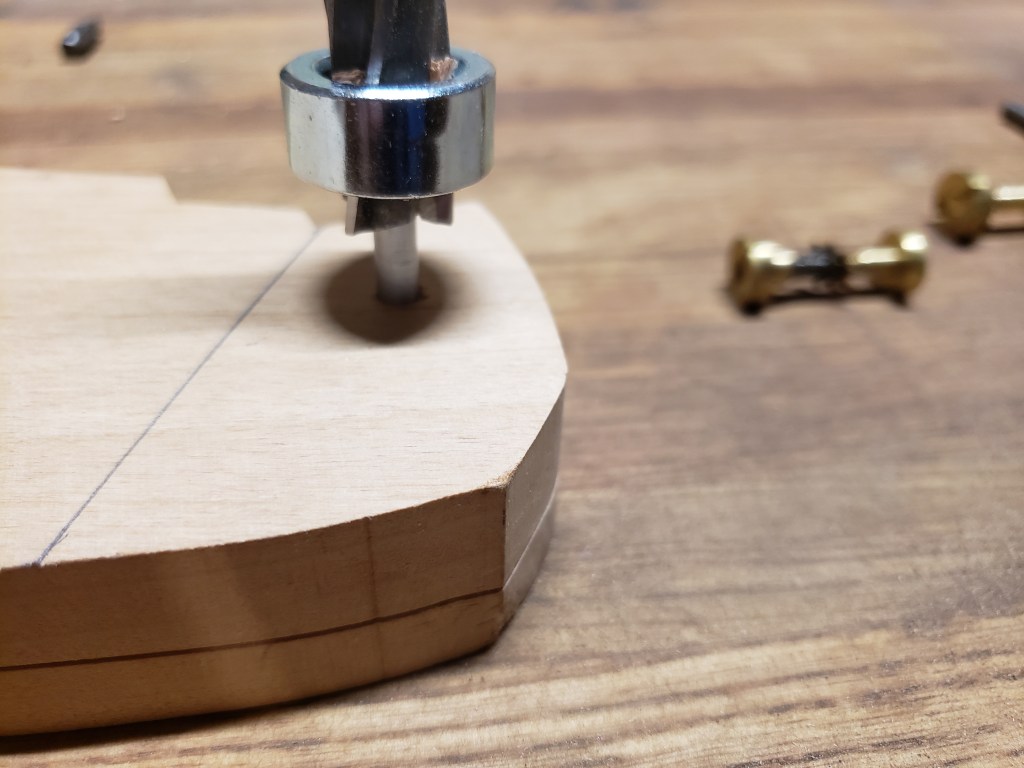
Next I used a 1/2 counterbore with a 3/16 pilot.

I use star lock washers, one on each end. Keep in mind that these washers dig in a little and that you will be sanding and shaping your handle. So I like to have the bolt seat just a little under the surface, so that once I do my final sanding, the bolt will be flush. Personal preference, but you can recede yours if you like.


The bolts will need trimming. Measure or mark the exposed threads and you can cut the excess with a hacksaw. I like using my disc sander to sneak up on my mark.
Note. You could use forstner bits but, lining up can be a real pain. If you happen to have a drill press with a long enough quill travel, you can clamp the handle in one spot and change out your drill bits.
For the plate, I like to reinstall the plate. Seat the plate and back in the slot and mortise. Hold it tightly and firmly in place. At this point I have two more small tools that help me line things up. A 3/16 centering rod (correct name?) with a sharp point. I insert it into the 3/16 hole and twist and turn to give a small scratch. And a automatic centering punch.


Remove the plate from the handle, locate the little scratch and you can now drill the hole. I like to use the centering punch to make this scratch easier to see.
Now go back to your drill press and use the carbide 3/16 spade bit to drill your holes.
It’s time to shape your handle. The blocky shape can be cut to the final size. I use a variety of rasps and files to get the final shape. A little sandpaper and its ready to apply finish.

Set and sharpen the teeth and make some sawdust!
